
Building a Hardened Linux Repository using an HPE Apollo 4200 Gen10 Server with Ubuntu 22.04 LTS for Veeam Immutable Backups
What is an immutable backup?
An immutable backup is a backup that cannot be altered in any way. Most commonly, this is for a specified period of time.
Why are immutable backups important?
Immutable backups are important for any organization in order to be able to recover their data in the face of increased advanced persistent threats. One example is a ransomware attack. An attacker can breach your network and deploy ransomware. Unless you have proper network visibility and controls, the attacker can move laterally on your network and quickly spread across your infrastructure. When the ransomware payload is deployed, all your data can be simultaneously encrypted. Backups are targeted for ransomware encryption. If the attacker can successfully encrypt your organization’s primary storage and backups, the odds of the organization paying the ransom significantly increase. Many compliance frameworks also require immutable backups for these reasons.
Bad actors have infinite attempts to get into your environment and only need to be successful once. IT staff have one shot to block attacks and must be right 100% of the time. These are not good odds.
How do we protect our organization?
We need to build hardened backup repositories to store immutable backups. We need to build this system with the assumption that our network is already compromised, and this system will be a designated survivor in the event of ransomware or other attacks. Secure backups are your last line of defense.
Do you have regulatory compliance requirements?
When properly configured, the Hardened Repository meets the requirements for non-rewritable, non-erasable storage as specified by SEC 17a-4(f), FINRA 4511(c) and CFTC 1.31(c)-(d) regulations. More information is available here.
Building the Hardened Linux Repository for Immutable Backups
We want the server to be a physical server and not a virtual machine. This is because if the hypervisor was compromised, you would have no protection for the virtual server. For this build, I cabled the server with two 10GbE connections. One to each of two redundant switches. I plugged the 1GbE iLO connection into a management switch on an administrative VLAN that has restricted access. The server had Advanced iLO licensed, so we can use the remote media and GUI KVM features.
For this build, we are using an HPE XL420 Gen10 (Apollo 4200) Server (Cascade Lake), certified with Ubuntu 22.04 LTS Jammy Jellyfish.
Download the latest HPE SPP from here. As of the time of writing, it is 2022.03.0.
Login to iLO and attach the ISO image on your laptop to the virtual DVD drive or create a bootable USB stick and boot the server.
Use the non-interactive automatic update.


When the process completes, reboot the server and press F9 to go into the system utilities.

Click on system configuration.

Then click on BIOS/Platform Configuration (RBSU)

Then click on Server Security.

Then click on Secure Boot Settings

Then change Attempt Secure Boot to Enabled.
Why is this important?
After Secure Boot is enabled and configured, only software or firmware signed with approved keys are allowed to execute. Secure Boot helps a computer resist attacks and infection from malware. Secure Boot detects tampering with boot loaders, key operating system files, and unauthorized option ROMs by validating their digital signatures. Secure boot requires the UEFI mode to be set to UEFI Optimized Boot.

The system will warn you that a reboot is required for this to take effect.
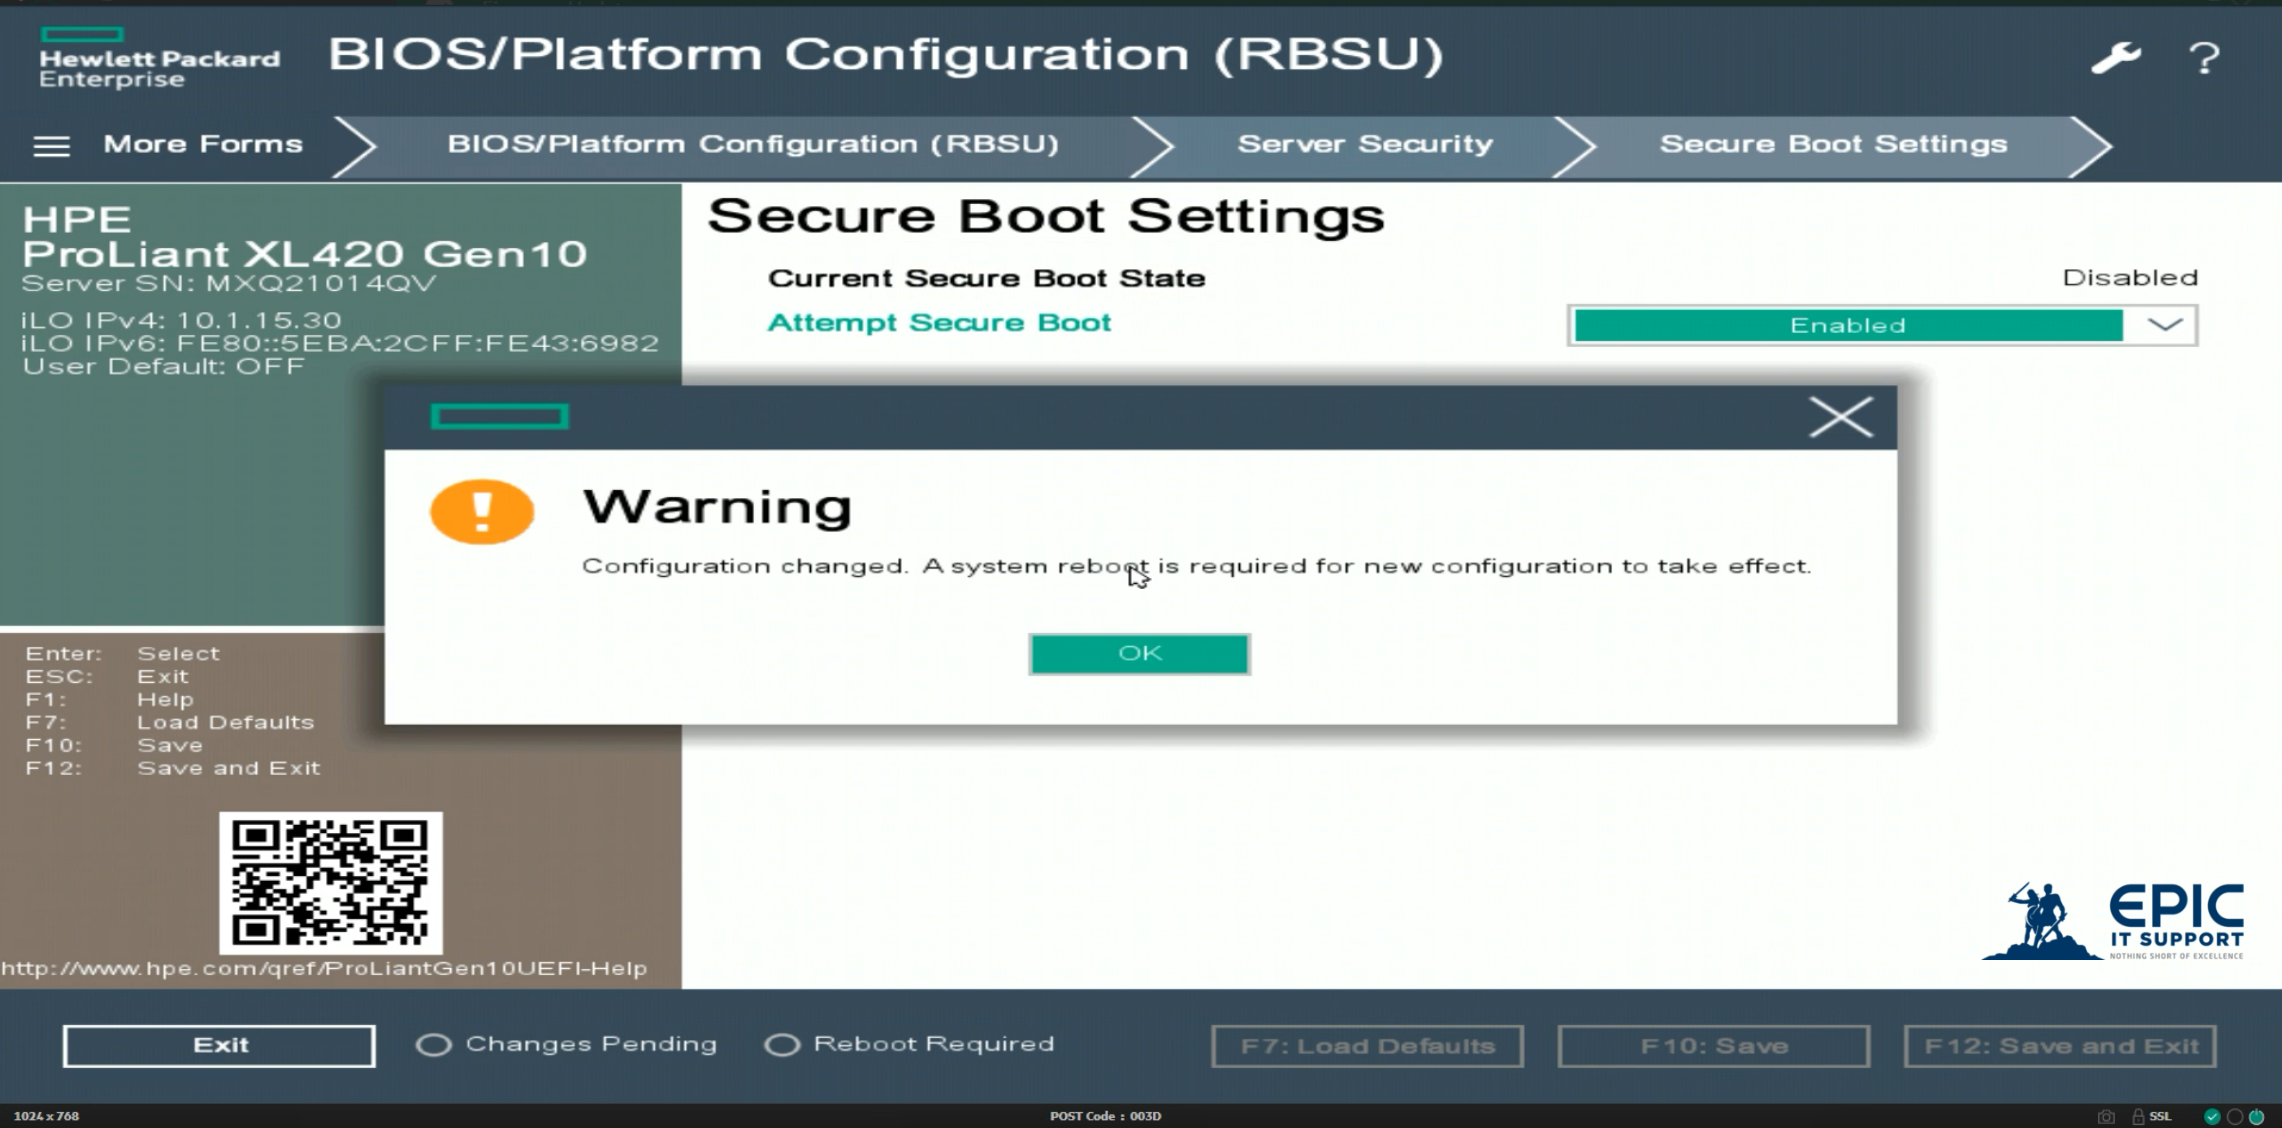
Click the OK in the pop up warning.

Click Exit

On the top menu navigation where shown, click on System Configuration to go up two levels in the menu.

Click on the Smart Array P816i-a SR Gen10 RAID controller. We are now going to configure the storage.

Click on Launch Smart Storage Administrator (SSA) in order to bring up the storage configuration utility.

This screen will appear. Click Exit and launch Smart Storage Administrator (SSA)

This screen will appear. Interrupt the automated Intelligent Provisioning process and select Smart Storage Administrator by pressing the down arrow and then enter

On the left hand navigation click on the RAID controller and in the main pane, click on Configure.

Click on Create Array

This particular server is configured with 12 x 6TB LFF 7200 RPM SAS hard drives and 2 x 960GB SATA SSD drives. We will be using the SSDs for the HPE SmartCache feature to accelerate the slower storage. For now, we will just focus on the spinning media. Click Select All on the drive type of SAS HDD. Then we click Create Array.
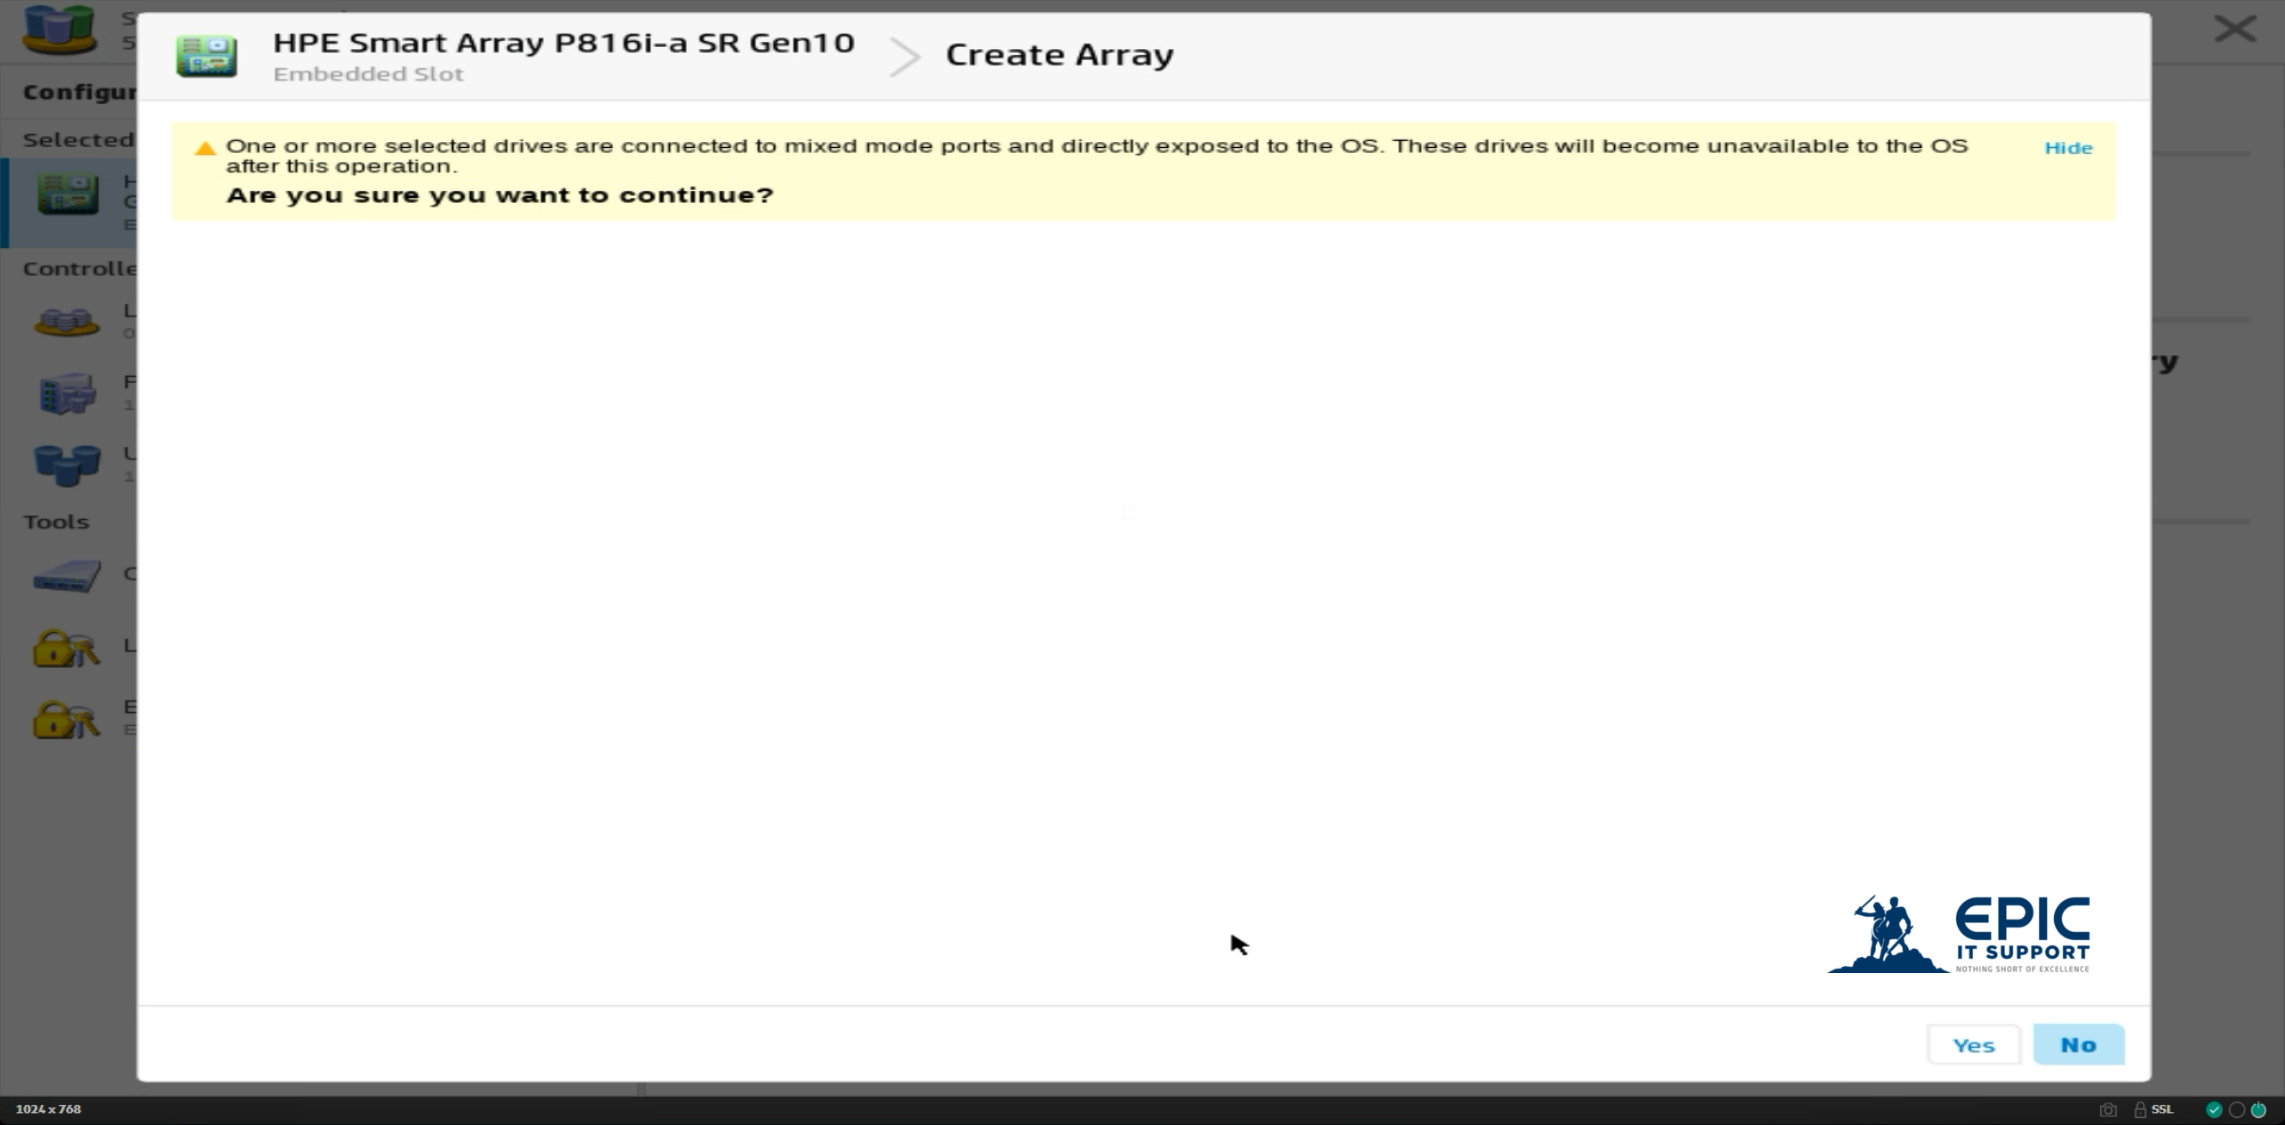
Because this operation is data destructive and changing the storage configuration, it asks us to confirm. Click Yes since this is a new server with no data on the hard drives.

Select RAID 6 and leave the remaining configuration choices at the defaults. Then click Create Logical Drive.
We chose RAID 6 because we want the data security it offers, and since this is a backup target, we are more concerned with data security than purely high performance. We also want the most available capacity, which is why we did not choose RAID60 with multiple redundant stripe sets. If you had a higher number of drives attached, you would likely want to choose RAID 60 and divide it into two or more redundant stripe sets. You need to weigh usable capacity versus rebuild time in a disk failure. Too many large drives in one stipe set will create an unreasonable RAID rebuild time.

The screen shows the logical drive creation process being successfully created. We then click Finish.

We then click on Cache Manager in the left-hand navigation, Controller Cache in the center pane, and select Enable HPE SmartCache in the right-hand pane. This is a licensed software feature of the RAID controller. HPE SmartCache is an included feature of the P816i-a SR Gen10 controller we configured for this server. It is available for other RAID controllers in the HPE product line, but you also have to purchase the SmartCache license separately.

The screen shows us the available SSD drives in the system. In our case we click Select All to choose both 960GB SSDs that are installed. Then click OK.

The screen notifies us that once we Enable SmartCache many features will not be available. We would need to disable the SmartCache prior to performing any of those operations. Click on Yes to continue.

We only have one Logical Drive to assign the cache. We select Logical Drive 1 and choose Write-Back with RAID 1. Then click Create SmartCache for Logical Drive.
This will allow the system to acknowledge writes to the operating system that is only written to the RAID 1 SSD volume without having to wait until the data is committed to the RAID 6 volume. This will improve write performance. We would not want to do this with RAID 0 because we would lose data if an SSD drive fails. The data will then asynchronously write from the SSDs to the RAID 6 volume. Read performance of the volume will also be improved as it will use the SSDs for read cache.

The screen shows us that the Cache Logical Drive was successfully created. Then click Finish.

If we look at the Cache Manager we can now see that Array B has been created. Array A is the large RAID 6 volume. There is one Logical Drive labeled Cache for LD1 that is active and consuming the equivalent of one drive as they are in a RAID 1 set. Everything looks good. Click the X in the upper right of the screen to exit the application.

It asks us to confirm. Click Ok.

This screen appears, notifying us to reboot the system. Using the virtual power control in Advanced iLO, reboot the server.
Ubuntu Operating System Installation
Then using the iLO virtual media, eject the HPE SPP ISO and mount the Ubuntu 22.04 LTS ISO.
The ISO can be downloaded from here. On the website select Option 2 - Manual Server Installation. Then click Download Ubuntu Server 22.04 LTS. The roughly 1.5GB ISO is named ubuntu-22.04-live-server-amd64.iso.

Choose the appropriate language by using the arrow keys and then press Enter.

Select the proper keyboard layout for your environment, and then select Done and press Enter.

We select Ubuntu Server (minimized) since, normally, no one will be logging into this server. Therefore we do not need all of the extra software packages that would be necessary. This is also beneficial because fewer packages will need patching in the future. It also reduces the attack surface. Select Done and press Enter.

Then create a network bond. In this implementation, two managed switches were not a chassis or virtual chassis. So we could not do LACP between the server and the two separate switches. Adjust the parameters to fit your networking environment. Select Create bond.

Select the two 10GbE network interfaces and choose balance-alb. This is adaptive load balancing. It is the best selection for this implementation as it does not require switch support. If you were plugging into one switch, chassis, or virtual chassis, you could select 802.3ad and configure the switch accordingly. Select Create and press Enter.

Assign an IP address to the newly created bond0 network interface. For this network Edit IPv4 was selected.

Enter in the appropriate information for your network. Select Save and press Enter.

The screen displays bond0 and the IP address information that was assigned. Choose Done and press Enter

This screen will appear to configure a proxy server if you have one in your network to get to the internet. In this case we do not. Select Done and press Enter.

Accept the default mirror address for Ubuntu packages. Select Done and press Enter.

We are going to choose a guided storage configuration. Configure Ubuntu to use the entire RAID 6 volume that we setup in the RAID controller. We are going to set this up as an LVM (logical volume manager) group. We are not going to have the operating system encrypt the drives. If encryption is desired we will configure that within Veeam. Select Done and Press Enter.

The installer will display the following. It will use just over 103GB of space for the EFI boot partition, /boot, and / on a logical volume named ubuntu-lv that is within the ubuntu-vg volume group. The remainder of the space will be free space within the ubuntu-vg volume group. At a later step we will create a large XFS file system for Veeam to act as the backup repository. Select Done and Enter.

This action is data destructive, so it asks you to confirm. Select Continue and press enter.

Create a user account and set the server’s hostname. I created a user named veeamsvc. I set the password to something reasonable to type in. Once I ssh into the server, I change the password to a long, randomly generated complex password that I can paste into the SSH terminal. Select Done and press Enter.

On the next screen we select Install OpenSSH server. At this point I don’t import any public SSH keys. Select Done and press Enter.

Don’t select any server snaps for install. None of this software is required for the server to act as a Hardened Linux Veeam repository. Select Done and Press Enter.
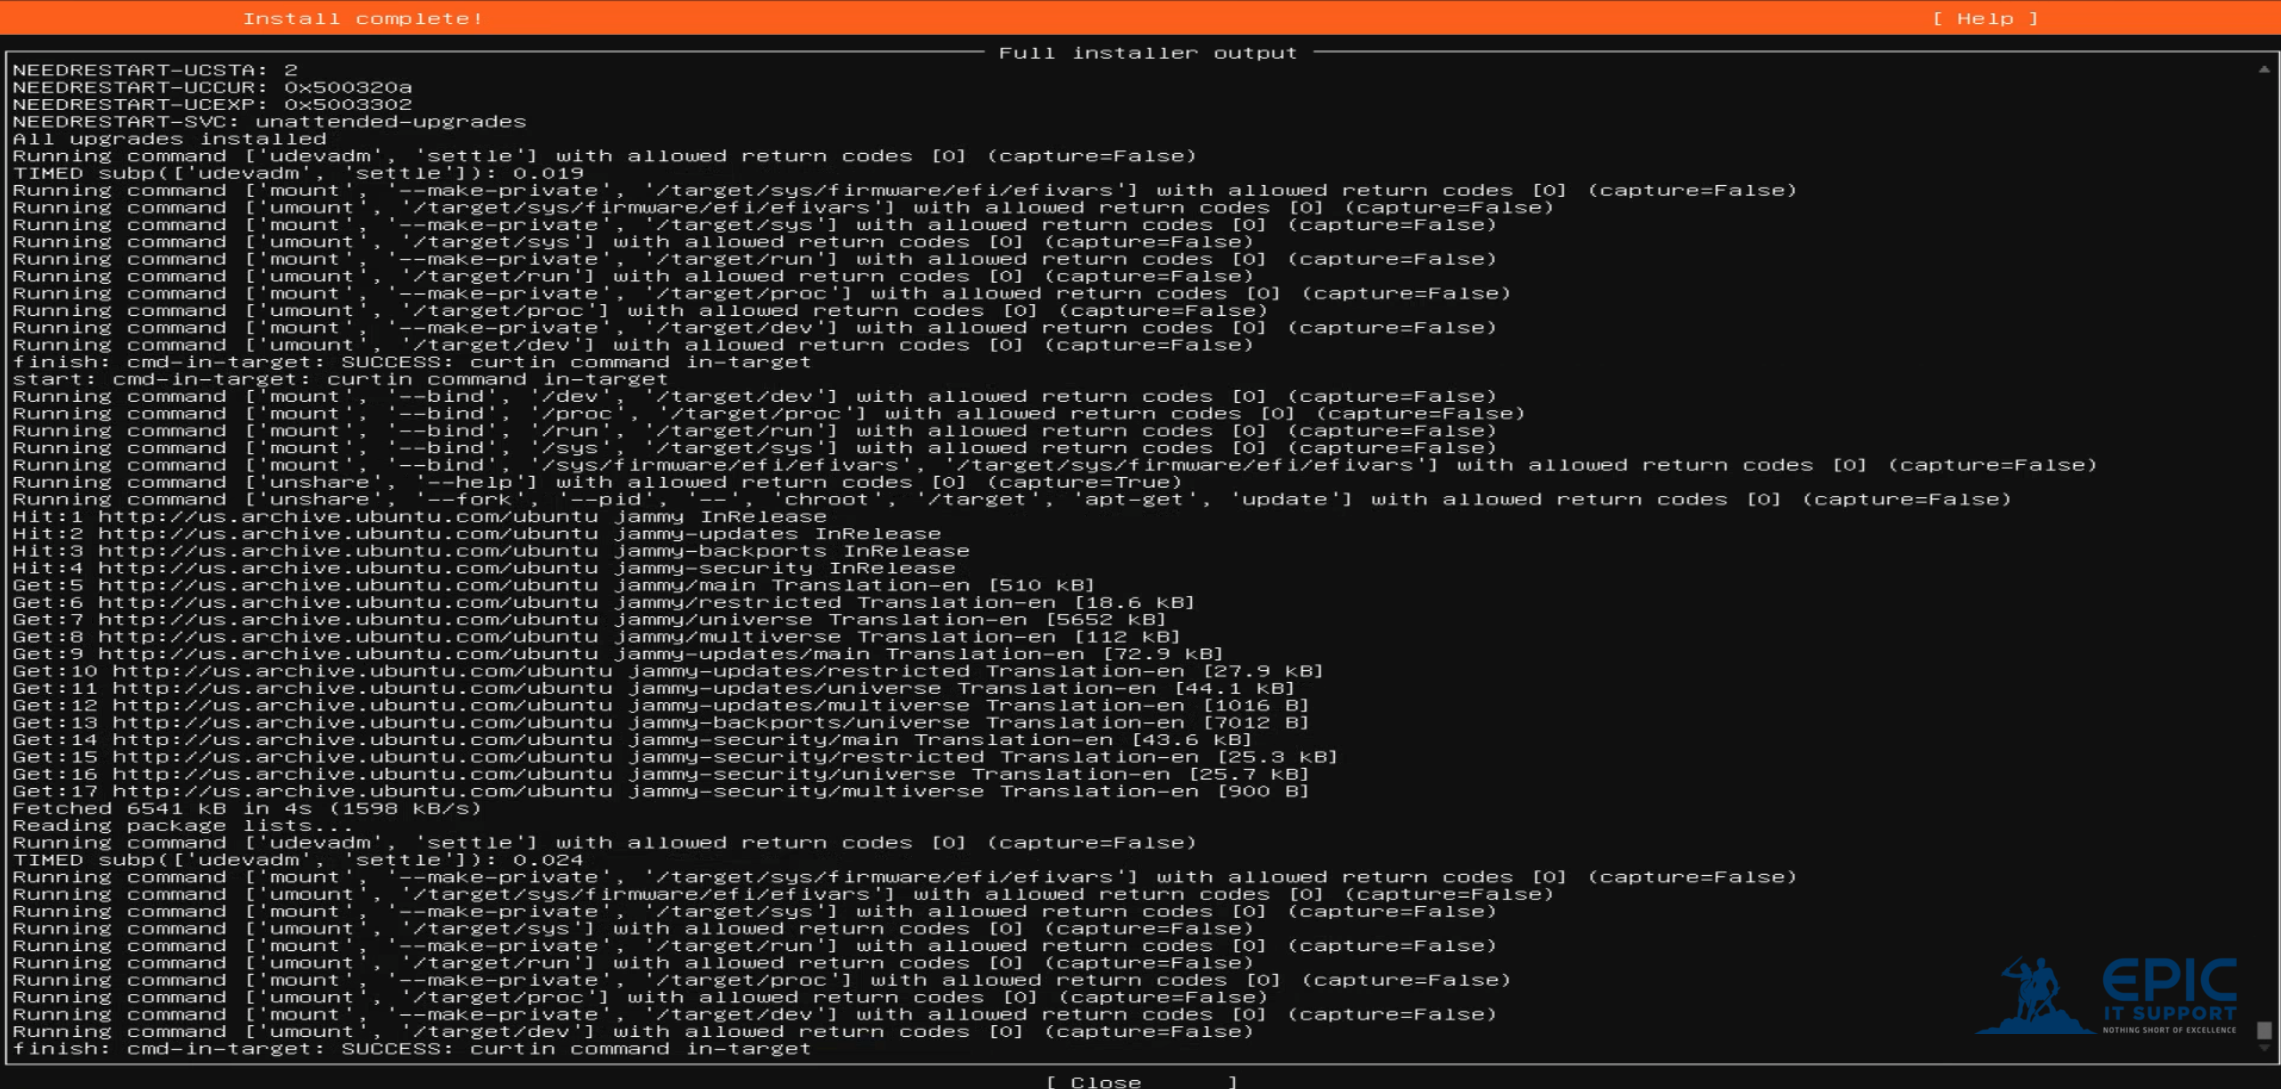
The install will proceed and eventually display this screen which shows Install Complete at the top of the screen. Select Close at the bottom and press Enter.

The next screen displays the end of the install log. Select Reboot Now and press Enter. Unmount the Ubuntu install ISO via the iLO remote media.
Post Ubuntu Install Configuration
Using the username and password, you configured, use an SSH client to connect to the IP address set for bond0. Putty is a popular free Windows SSH client. With a Mac, you can open the terminal and use ssh from the command line.
Run the following commands once you’ve successfully used SSH to login into the server. If you are unfamiliar with Linux/Unix, sudo will allow you to elevate privileges as the administrative or root user. You will be prompted for your own account’s password.
Change your password. Run the passwd command and follow the prompts. Change the password for the less complex password we used from the terminal when copy/paste was not available. Use a password manager or random password generator to create a complex password.
Update the operating system:
sudo apt update
sudo apt upgrade

You will see the operating system downloading the latest package headers so it knows what updates are available. The second command will instruct the operating system to download and install any packages that are newer than what is installed.
Type reboot and press Enter once the update is complete.
After the server reboots, reconnect to the server via SSH.
Add HPE Tools for Linux
We are doing to add software utilities that are specific for an HPE brand server running Linux. For example, these software utilities allow us to configure the RAID controller from the Linux command line versus rebooting the server into the BIOS and configuring from there.
Add location of HPE repository. Run the below command:
sudo echo "deb http://downloads.linux.hpe.com/SDR/repo/mcp focal/current non-free" > /etc/apt/sources.list.d/mcp.list
Add the HPE public keys that are used to sign the software packages:
sudo curl http://downloads.linux.hpe.com/SDR/hpPublicKey1024.pub | sudo apt-key add -
sudo curl http://downloads.linux.hpe.com/SDR/hpPublicKey2048.pub | sudo apt-key add -
sudo curl http://downloads.linux.hpe.com/SDR/hpPublicKey2048_key1.pub | sudo apt-key add -
sudo curl http://downloads.linux.hpe.com/SDR/hpePublicKey2048_key1.pub | sudo apt-key add -
Run the below commands to update and install the HPE utilities:
sudo apt update
sudo apt install hponcfg ams ssacli ssaducli ssa
Create Large Filesystem for Backup Storage
Create an empty directory to mount the filesystem we are going to create.
sudo mkdir /mnt/backups
Create a volume using LVM (Logical Volume Manager). The volume will appear as a block device or disk. We will write the filesystem to the volume. The below command uses 100% of the remaining free space in the volume group that was created during the installation.
sudo lvcreate -n backups-lv -l 100%FREE ubuntu-vg
Create the XFS file system on top of the volume. We use the specific options listed below as recommended by Veeam. These options are recommended by Veeam to take advantage of filesystem features that Veeam uses for Fast Clone. From the Veeam manual “Fast Clone is the Veeam Backup & Replication technology that helps create quick file copies. Fast Clone increases the speed of synthetic backup creation and transformation, reduces disk space requirements and decreases the load on storage devices. With this technology, Veeam Backup & Replication references existing data blocks on volumes instead of copying data blocks between files. Data blocks are copied only when files are modified.”
size=4096 sets file system block size to 4096 bytes,
reflink=1 enables reflinking for the XFS instance (disabled by default),
crc=1 enables checksums, required for reflink=1 (enabled by default).
sudo mkfs.xfs -b size=4096 -m reflink=1,crc=1 /dev/ubuntu-vg/backups-lv
We will need to edit the /etc/fstab file so our new filesystem automatically mounts on boot. One text editor that will be installed by default is nano. I prefer to use vi/vim. Regardless you need to be able to edit a text file.
To install vi/vim
sudo apt install vim
We want to get the block UUID of the logical volume. The purpose of this is the UUID is a persistent device naming convention. Even if volumes are added to the server, the UUID should stay the same in the future. Therefore we are less likely to have any issues in the future with the volume mounting if there are storage configuration changes.
ls -l /dev/disk/by-id/dm-*
lrwxrwxrwx 1 root root 10 Jun 21 15:56 /dev/disk/by-id/dm-name-ubuntu--vg-backups--lv -> ../../dm-1
lrwxrwxrwx 1 root root 10 Jun 21 05:51 /dev/disk/by-id/dm-name-ubuntu--vg-ubuntu--lv -> ../../dm-0
lrwxrwxrwx 1 root root 10 Jun 21 05:51 /dev/disk/by-id/dm-uuid-LVM-7rNUeuY0TI4zSt0gsaQY8naVz2NvJGO0mdt2OMrEqtJsbn412aJEYki9s4h94Q4b -> ../../dm-0
lrwxrwxrwx 1 root root 10 Jun 21 15:56 /dev/disk/by-id/dm-uuid-LVM-7rNUeuY0TI4zSt0gsaQY8naVz2NvJGO0tdB9dt8QHEagJPf4tdM0xlR7rofYnQsW -> ../../dm-1
The logical volume we created for the backup storage corresponds to dm-1. We will add the below to the /etc/fstab
/dev/disk/by-id/dm-uuid-LVM-7rNUeuY0TI4zSt0gsaQY8naVz2NvJGO0tdB9dt8QHEagJPf4tdM0xlR7rofYnQsW /mnt/backups xfs defaults 0 1
Run sudo mount -a to ensure we see no errors and the new filesystem mounts.
Check the filesystems by running df -h
Filesystem Size Used Avail Use% Mounted on
tmpfs 6.3G 1.7M 6.3G 1% /run
/dev/mapper/ubuntu--vg-ubuntu--lv 98G 11G 83G 12% /
tmpfs 32G 0 32G 0% /dev/shm
tmpfs 5.0M 0 5.0M 0% /run/lock
/dev/sdb2 2.0G 126M 1.7G 7% /boot
/dev/sdb1 1.1G 5.3M 1.1G 1% /boot/efi
tmpfs 6.3G 4.0K 6.3G 1% /run/user/1000
/dev/mapper/ubuntu--vg-backups--lv 55T 389G 55T 1% /mnt/backups
We can see our new 55TB volume is mounted on /mnt/backups
Now we need to set the permissions on the new filesystem so that it works with Veeam for the backups. The below sets the ownership to the veeamsvc user and group and sets the permissions so that only the veeamsvc user can read, write, and go into the /mnt/backups directory.
sudo chown -R veeamsvc:veeamsvc /mnt/backups
sudo chmod 700 /mnt/backups/
Check the results of changing the permissions:
ls -ltd /mnt/backups
drwx------ 2 veeamsvc veeamsvc 6 Jun 21 15:56 /mnt/backups
Check which services called daemons in Linux are listening for network connections. We want to ensure only SSH is listening on the network to make the server as secure as possible.
sudo ss -tulpn | grep LISTEN
tcp LISTEN 0 4096 127.0.0.53%lo:53 0.0.0.0:* users:(("systemd-resolve",pid=1103,fd=14))
tcp LISTEN 0 128 0.0.0.0:22 0.0.0.0:* users:(("sshd",pid=1155,fd=3))
tcp LISTEN 0 128 [::]:22 [::]:* users:(("sshd",pid=1155,fd=4))
We can see that systemd-resolve is listening. It is a DNS resolver, but it is only listening on loopback/localhost. It is not a concern because it is not listening on the exposed network interface. We can see that sshd is listening on both IPv4 and IPv6. There are no other services listening. This is what we expect.
Integrate Veeam Backup and Recovery with the Linux Hardened Backup Repository
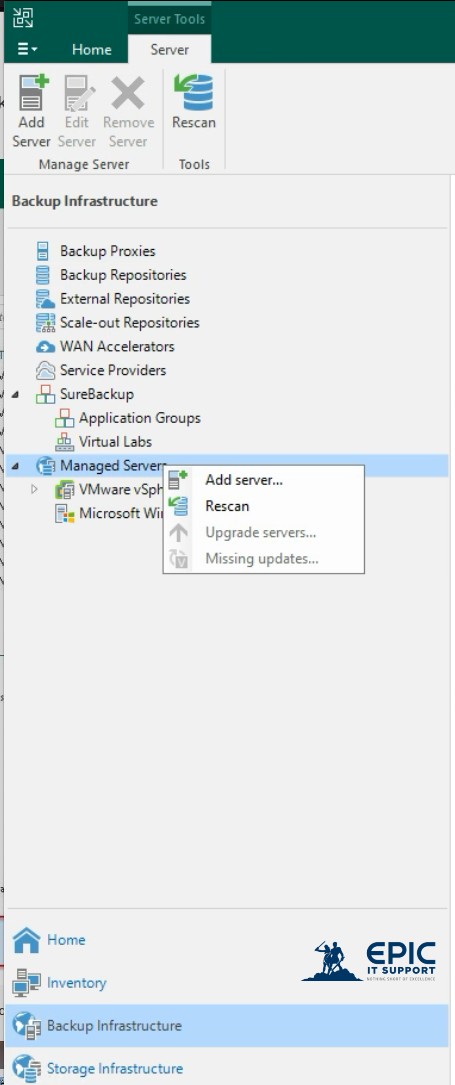
Open your Veeam console. Click on Backup Infrastructure in the navigation. Right mouse click on Managed Servers and click Add server.

The Add Server dialog appears. Click on Linux.

Add the DNS name or IP address of the Linux server. Optionally put a description if desired to identify the server in a large environment. Click Next.

On the right side click Add -> Single-use credentials for hardened repository to add the credentials. I will use the veeamsvc username and the password. According to the Veeam manual “To build a hardened repository, click Add and select Single-use credentials for hardened repository. Veeam Backup & Replication does not store these credentials, they are used only for deploying Veeam Data Mover to the server. These credentials reduce the rights for the Veeam Data Mover. Single-use, or temporary, credentials is a recommended option for a hardened repository”

Enter in the username and password that you created and used to SSH into the server. Enter a description of the credentials. Click on OK.

Click on Next.

Click on Apply.

Veeam will install and configure the Data Mover service on the Linux server. It will show the installation is successful. Click Next.

Veeam will display the summary. Then click Finish. Now that the server is added, we will add the backup repository.

Right mouse click on Backup Repositories and click on Add backup repository.

Select Direct attached storage.

Click on Linux.

Fill out the Name and Description, and click Next.

From the drop down under Repository server, select the Linux server we added earlier. Then click the Populate button. All of the filesystem paths will be displayed. Click on the /mnt/backup path, and click Next.

In the Location field enter the path to the top level folder that you want the veeam backups to be written. I chose /mnt/backups/veeam. Click the checkbox for Use fast cloning on XFS volume. Click the checkbox for Make recent backups immutable for X days. I chose 7. However many days you choose the backups cannot be deleted or modified during that time period. The longer the better, but you need to balance your usable backup capacity versus the immutable time so that you don’t fill up your repository. You want the immutable time to be long enough that you would likely know your systems are compromised with ransomware, and have enough history you could restore your systems to a state prior to being compromised. For this build the server has plenty of CPU and memory resources. The bottleneck of writing backups will not be this server. I unchecked the Load control checkboxes. If you were overwhelming the resources on this server and started seeing high storage latency, you could limit the number of concurrent tasks or the bandwidth of the server. Click Next.

Select the Mount server from the dropdown. This will likely be a Windows virtual machine or physical server depending on the environment. It will generally be the same server that is the backup server. Ensure the Enable vPower NFS server on the mount server is selected, and click Next.

The Review screen will appear. Click Apply. We don’t need to search the repository for existing backups and import them since this is a new server with no data. If you were re-adding this server at a later date, you would want to select to import the backups on the server. Click Apply.

Click Next, and on the Summary page click finish. At this point, the Veeam backup repository configuration is complete. You can now either add this repository to a scale-out backup repository or not, depending on your environment. You can then edit or create your backup jobs to write to the new repository.
Linux Hardening and Cleanup
We will now perform some remaining Linux tasks to further secure the operating systems and revoke now unnecessary permissions from our veeamsvc account now that the data mover service is installed.
Create a user account we will add two-factor (2FA/MFA) authentication for administering this server.
SSH into the Linux server as the veeamsvc account and run the following commands. Replace the word user with the name of your user account.
Add the user account:
sudo useradd user -m -s /bin/bash
Set the password:
sudo passwd user
Add the new user to the sudo group:
sudo usermod -a -G sudo user
Remove the veeamsvc account from all privileged groups:
sudo deluser veeamsvc adm
sudo deluser veeamsvc cdrom
sudo deluser veeamsvc sudo
sudo deluser veeamsvc dip
sudo deluser veeamsvc plugdev
sudo deluser veeamsvc lxd
Now we will restrict SSH to our administrative user so veeamsvc and root cannot SSH into the server.
Using a text editor, edit /etc/ssh/sshd_config
Add the following replacing “user” with your actual administrative username:
AllowUsers user
PermitRootLogin no
Protocol 2
Restart sshd to implement the changes:
sudo systemctl restart sshd
We will set up public/private SSH keys. Then we will configure the server to only accept the key and not a password. Using keys is more secure than passwords. Using openssh on a Mac or Linux computer we will run the below. Replace keyname with the hostname of the server this key is associated with, or some naming convention so you know it goes to your Veeam hardened Linux repository. Use a secure passphrase to encrypt your private key.
ssh-keygen -o -a 100 -t ed25519 -f ~/.ssh/id_keyname -C "[email protected]"
SSH with a new connection into the Linux server using your new administrative user.
Create the directory and file to store the public SSH key.
mkdir ~/.ssh
chmod 700 ~/.ssh/
vi ~/.ssh/authorized_keys
In the authorized_keys file, insert the content of the public key you created, which will have a .pub file extension.
Set the permissions on the authorized_keys file:
chmod 600 ~/.ssh/authorized_keys
If you are using putty as your SSH client, you will need to import your private SSH key into the client since putty uses a different format. Here is an article describing how to use PuTTYgen which performs this task and converts your private key into a .ppk file (Putty Private Key)
Test using SSH into the server with the public/private key authentication.
Setup Multifactor Authentication
We will use Google Authenticator. We specifically want this server to have unique accounts that are used nowhere else in the domain which is why we are not integrating the server with Active Directory or Single Sign-On.
sudo apt update
sudo apt install libpam-google-authenticator
As your administrative user account, run the command google-authenticator. At the end it will produce a QR code that you need to add to your authenticator app such as Google Authenticator or many password managers also support storing this. Also, securely store your emergency codes when they are generated.
You will see the below. Answer with the same responses as provided below.
Do you want authentication tokens to be time-based (y/n) y
Do you want me to update your "~/.google_authenticator" file (y/n) y
Do you want to disallow multiple uses of the same authentication
token? This restricts you to one login about every 30s, but it increases
your chances to notice or even prevent man-in-the-middle attacks (y/n) y
By default, a new token is generated every 30 seconds by the mobile app.
In order to compensate for possible time-skew between the client and the server,
we allow an extra token before and after the current time. This allows for a
time skew of up to 30 seconds between the authentication server and client. Suppose you
experience problems with poor time synchronization. In that case, you can increase the window
from its default size of 3 permitted codes (one previous code, the current
code, the next code) to 17 permitted codes (the eight previous codes, the current
code, and the eight next codes). This will permit a time skew of up to 4 minutes
between client and server.
Do you want to do so? (y/n) n
If the computer that you are logging into isn't hardened against brute-force
login attempts, you can enable rate-limiting for the authentication module.
By default, this limits attackers to no more than three login attempts every 30s.
Do you want to enable rate-limiting (y/n) y
Edit the /etc/pam.d/sshd file:
sudo vi /etc/pam.d/sshd
Append this to the bottom of the file:
auth required pam_google_authenticator.so nullok
auth required pam_permit.so
Edit the /etc/ssh/sshd_config file:
Add the following to the bottom of the file:
ChallengeResponseAuthentication yes
AuthenticationMethods publickey,password publickey,keyboard-interactive
Edit the /etc/pam.d/sshd file:
sudo vi /etc/pam.d/sshd
Comment out the below by putting a # sign at the beginning of the line:
@include common-auth
Restart sshd
sudo systemctl restart sshd.service
When you SSH in now, you will utilize your private SSH key. You will need to supply the passphrase that symmetrically encrypts the private key. Then the Linux server will prompt you for a password which is the 6-digit number from Google Authenticator. If you need to use sudo to elevate privileges, you will need to supply the actual password for your account.
The backup server should be on an isolated network to protect it.
Additionally, in a high-security environment, you can also take one or more of the following actions:
Unplug iLO from the network
Disable SSH entirely
Using the host-based Linux firewall, only allow the backup server to connect to the Veeam ports on the Linux server and only allow specific administrative systems to connect via SSH.